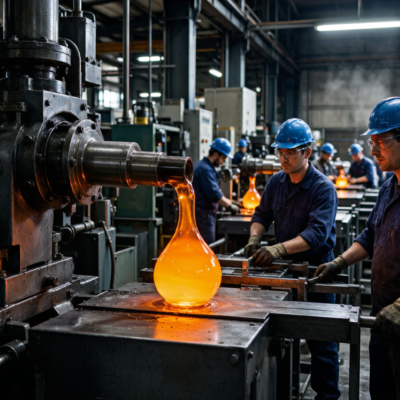
The sample arrives. It is heavy, the shoulders are crisp, the tint is exactly the amber you specified, and the gold logo sits perfectly on the front panel. You approve it, wire the tooling payment, and eight weeks later the first production shipment lands — and something is off. The color reads slightly greener. The shoulder has a soft edge where the sample was sharp. The base feels a touch lighter in the hand.
This is the single most common disappointment in custom perfume glass bottle sourcing, and it is almost never fraud or incompetence. It is physics, economics, and a process change that nobody explained. This article breaks down exactly where the gap comes from, which differences are acceptable, which are defects, and how to write a specification that closes the gap before you pay for tooling.
The Core Reason: Samples and Production Are Made by Different Processes
Most buyers assume their approved sample was made on the production mold that will run their order. Often it was not.
There are three common routes to a pre-production sample:
- CNC-machined from solid glass block. Used when no mold exists yet. Produces excellent surface finish and sharp detail, but the glass is a different billet with different optical properties, and there is no parting line at all.
- Single-cavity pilot or “sample” mold. A cheap, low-cavity mold cut to the same drawing. Closer to production, but run at low speed with generous cooling time and heavy hand finishing.
- Production mold, first shots. The most representative, and also the most expensive to arrange, because it requires the production tooling to exist and a machine slot to be booked.
Routes 1 and 2 dominate the sampling phase because they are fast and cheap. That is fine — as long as you know which one produced your sample and you set tolerances accordingly.
Nine Sources of Sample-to-Production Drift
1. Cooling Rate and Glass Density
A pilot mold running at low speed lets the glass cool slowly and evenly. A production mold running at commercial speed chills the skin faster. Different cooling history means slightly different internal stress, which changes how light refracts through the glass. The result is a subtle shift in perceived color and brilliance — most noticeable in tinted and heavy-base bottles.
2. Batch-to-Batch Color Variation
Glass color comes from the raw batch, and the batch comes from a furnace running continuously for 10–15 years. Furnace conditions drift. Recycled cullet ratios change. Iron content in the sand varies by delivery.
Realistic expectation: a color tolerance of ΔE ≤ 1.5–2.0 in CIELAB under D65 lighting for a standard fragrance tint. Tight and achievable. Demanding ΔE ≤ 0.5 across multiple production runs is not realistic without paying for a dedicated furnace campaign, which means a minimum quantity nobody launching a fragrance wants to commit to.
3. Wall Thickness Distribution
On a pilot mold, glass distribution is adjusted by hand until it looks right. In production, the same distribution must hold across four or six cavities simultaneously, at speed, for twelve hours. Thicker areas cool slower and sag slightly; thin areas set faster.
Practical tolerance on a 50 ml bottle: ±0.3 mm on body wall, ±0.5 mm on base thickness, measured ultrasonically at defined points.
4. Cavity-to-Cavity Variation
This one surprises buyers most. Your sample came from cavity 1. Production runs cavities 1 through 4, and each is a physical object with its own thermal behavior and wear state. Cavity 3 might run 3 °C hotter and produce slightly different shoulder definition.
Good practice: request a cavity-identification sample set — two bottles from each cavity, marked by cavity number — before full production. Compare them side by side. If the difference between best and worst cavity is visible to your eye, it will be visible to your customer.
5. Hand Finishing on Samples
Sample bottles are often hand-polished, sometimes flame-polished, and individually selected. Production bottles get whatever the line provides. A sample with a fire-polished neck and a hand-buffed base looks better than line output by definition. Ask your supplier to confirm whether your sample received any hand finishing that production will not include.
6. Mold Wear from Day One
Your sample was made on a new or freshly polished mold. By the time a 100,000-piece run finishes, the mold has heat-checked slightly, and seam lines are more visible than on the sample. This is normal and bounded by a good mold maintenance schedule, but it means the sample represents the best the tooling will ever produce, not the average.
7. Decoration Applied Under Different Conditions
If your sample was hand-sprayed or printed on a single-piece jig, the coating thickness, cure time, and color density will differ from a production line running 3,000 pieces per hour through a fixed-cycle booth. Two-tone masking and registration, in particular, are much tighter by hand. See two-tone spray coating for how masking tolerance changes at speed.
8. Annealing and Stress
Production bottles go through a lehr at a defined belt speed. A prototype that cooled in a bench annealing oven has a different stress profile. This matters for two reasons: optical appearance, and thermal shock resistance during filling.
9. Lighting and Environment at Approval
A sample approved on a desk under warm LED looks different from the same bottle in a retail shelf under 4,000 K spotlight. Always approve color in a light booth at D65 plus at least one retail-relevant source, and always include the filled state — perfume liquid changes perceived glass color substantially, especially in the 20–40 ml range where the fill line sits high.
What Normal Variation Looks Like
| Attribute | Realistic production tolerance | Notes |
|---|---|---|
| Height | ±0.5 mm (up to 100 ml), ±0.8 mm above | Affects carton and pump fit |
| Body diameter | ±0.4 mm | Check against secondary packaging |
| Neck bore (crimp finish) | ±0.15 mm | Critical for leak testing |
| Neck outer diameter | ±0.2 mm | Affects collar crimp quality |
| Weight | ±4–6% of nominal | Heavy-base bottles drift more |
| Wall thickness | ±0.3 mm body, ±0.5 mm base | Measure ultrasonically at defined points |
| Color (tinted glass) | ΔE ≤ 1.5–2.0 (D65) | Tighter requires dedicated campaign |
| Coating thickness | ±5–8 µm | Varies by application method |
| Decoration registration | ±0.3 mm on flat panel | Larger on compound curves |
Anything outside these bands is a legitimate quality claim. Anything inside them is normal industrial variation, and fighting it will cost you time and goodwill without making the product better.
The Specification That Prevents the Problem
The fix is not to demand perfection. It is to define acceptance before tooling.
1. Require a “golden sample” from production tooling.
Not from a pilot mold, not CNC-machined. Book machine time on the actual production mold — usually 2–4 weeks after tooling completion — and keep three sealed units. One goes to you, one stays at the factory, one goes to a third party if a dispute arises.
2. Define measured tolerances, not adjectives.
“Same as sample” is unenforceable. “Height 82.0 ±0.5 mm, weight 145 g ±6%, ΔE ≤ 2.0 against Pantone reference X under D65” is enforceable.
3. Request a cavity set before full run.
Two bottles per cavity, labeled. Approve or reject as a set.
4. Specify the measurement method and sample size.
AQL 2.5 for visual, AQL 1.0 for critical dimensions, sample size per ISO 9001 quality management 2859-1. State which gauge measures the neck bore and whether it is a go/no-go plug gauge or a bore micrometer.
5. Set the color reference properly.
A physical Pantone or glass reference chip beats a digital hex value every time. Keep it under controlled storage — paper and fabric references fade.
6. Agree the rework and reject path in advance.
What percentage of decoration rejects triggers a re-run? Who pays freight? What happens to off-spec but saleable goods?
7. Include the filled state in approval.
Approve the bottle filled with the actual perfume, under the cap, in the carton. Half of all “the color is wrong” complaints are actually about the liquid-glass-carton interaction, not the glass.
When the Difference Is a Real Defect
Some gaps are not acceptable drift:
- Neck bore out of round beyond 0.15 mm — this is a leak risk, not a cosmetic issue. Reject.
- Visible seam flash on the sealing surface — reject, regardless of how minor it looks.
- Coating adhesion failure in a cross-hatch test — reject; this indicates a surface preparation failure upstream.
- Color outside agreed ΔE — reject if the contract specifies it; negotiate a price adjustment if it is borderline and the goods are otherwise saleable.
- Dimensional drift that breaks secondary packaging fit — reject; a bottle that rattles in its carton damages the brand more than a slightly off color.
- Stones, cords, or blisters in the glass on the front panel of a prestige bottle — reject; these are melt defects, not variation.
Setting Realistic Expectations With Your Team
Internally, the useful framing is this: the sample shows you the design; production shows you the process. Your job during sampling is to confirm the design is right. Your job during first-article approval is to confirm the process can hold it, repeatedly, across all cavities, over a full run.
Brands that skip this distinction end up in the worst possible position — approving a beautiful sample, then spending the launch window arguing about whether production is “acceptable.” Brands that plan for it build a two-week buffer into the schedule for first-article correction, and treat the golden sample as the real start of the project.
It also changes how you evaluate suppliers. A factory that volunteers cavity-set samples and measured tolerance data before you ask is telling you they have been through this conversation before. A factory that says “it will be exactly like the sample” is making a promise it will not be able to keep.
FAQ
Why does my production bottle look different from the approved sample?
Because they were usually made by different processes. Samples are commonly CNC-machined from solid glass or produced on a low-speed single-cavity pilot mold with hand finishing, while production runs a four- or six-cavity mold at commercial speed. Different cooling rates, cavity-to-cavity thermal variation, batch color drift, and mold wear all contribute. The sample represents the best the tooling will ever produce, not the production average.
What tolerance should I accept on bottle color?
A color tolerance of ΔE ≤ 1.5–2.0 in CIELAB measured under D65 lighting is realistic and achievable for a standard fragrance tint. Demanding ΔE ≤ 0.5 across multiple runs requires a dedicated furnace campaign with a large minimum quantity. Always approve color against a physical reference chip in a light booth, in the filled state, under at least one retail-relevant light source — perfume liquid significantly changes perceived glass color.
Should I approve a sample made on a pilot mold?
You can use a pilot-mold sample to confirm the design, but you should not treat it as the acceptance standard. Require a golden sample produced on the actual production tooling — typically 2–4 weeks after tooling completion — and keep three sealed units: one for you, one at the factory, one held by a third party for dispute resolution. Also request a cavity-identification set with two bottles per cavity before the full run.
What dimensional variation is normal in glass bottle production?
For a bottle up to 100 ml: height ±0.5 mm, body diameter ±0.4 mm, weight ±4–6% of nominal, body wall ±0.3 mm, and base thickness ±0.5 mm. Neck bore on a crimp finish is the tightest at ±0.15 mm because it determines leak performance. Decoration registration on a flat panel is typically ±0.3 mm, and coating thickness ±5–8 µm depending on application method.
When should I reject a production run?
Reject for functional and safety issues regardless of how minor they appear: neck bore out of round beyond 0.15 mm, seam flash on the sealing surface, coating adhesion failure in cross-hatch testing, and glass defects such as stones, cords, or blisters on the front panel. Also reject any dimensional drift that breaks secondary packaging fit. For borderline cosmetic issues like minor color drift, a negotiated price adjustment is usually faster and cheaper than a re-run.
How can I reduce the sample-to-production gap before it happens?
Define acceptance in numbers before paying for tooling. Require a golden sample from production tooling, request a cavity set, specify AQL levels and measurement methods, use a physical Pantone or glass reference chip, include the filled state in approval, and agree the rework and reject path in advance. Build a two-week buffer into the schedule for first-article correction — the golden sample, not the prototype, is the real start of the project.