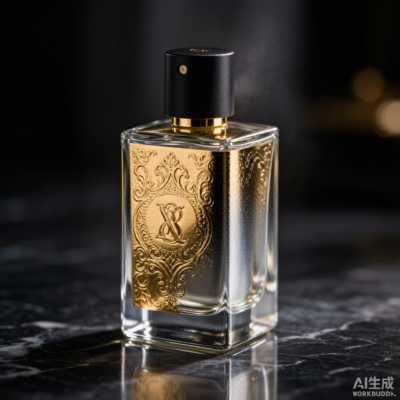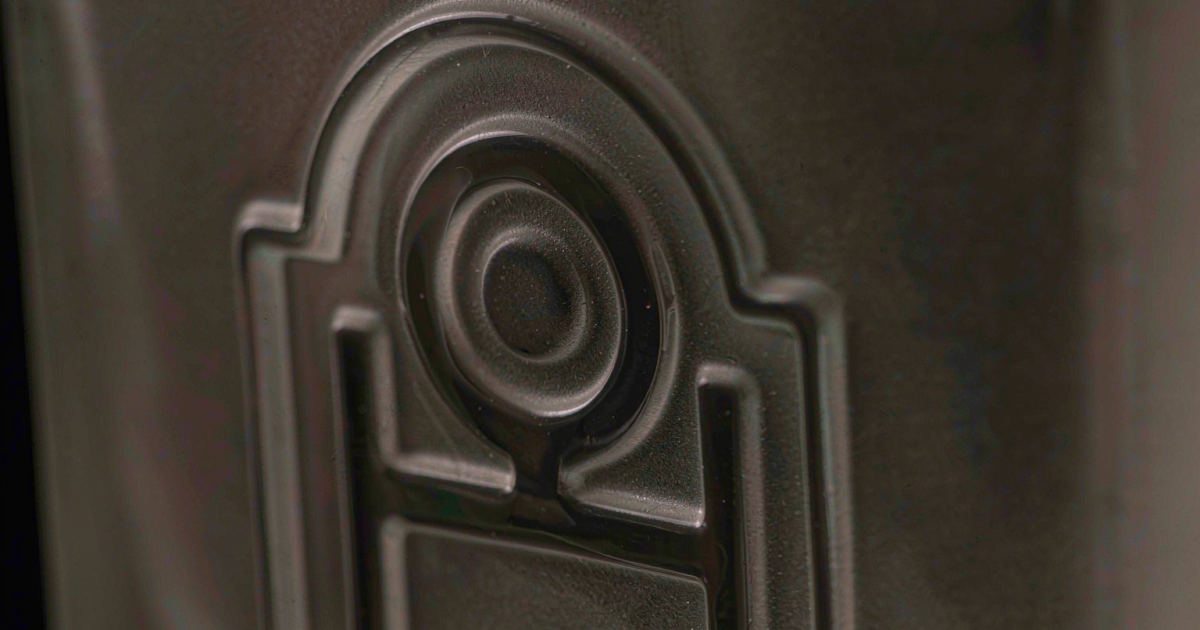
“Can we emboss our logo on the glass?” is one of the most common requests in a fragrance packaging brief, and one of the most inconsistently answered. Ask three suppliers and you will get three prices that differ by a factor of four — because “emboss” describes at least three different processes, and only one of them actually changes the glass.
The distinction matters commercially. A true in-mold relief is a permanent feature of the bottle: it survives filling, shipping, and being dropped in a bathroom sink for a decade. An applied relief is a surface treatment that can lift, yellow, or wear through. Both look convincing in a sample photo and neither is visible in a quotation that says “embossed logo”. This article covers how 3D detail is actually created in glass, what the mold can and cannot hold, where relief fails in production, and how to cost it honestly.
Three Processes That All Get Called “Embossing”
In-mold relief. The mold cavity is engraved with the negative of your design. When the glass is formed at around 1,000–1,100 °C, it takes that shape. The relief is glass — the same material, the same thickness allowance, the same durability. This is what most brands think they are buying.
Subtractive surface work. Acid etching, sandblasting through a resist, or mechanical engraving after the bottle is formed. The result is a shallow surface texture, typically 0.05–0.3 mm deep, and it is a decoration rather than a structural feature. The difference between these techniques, their depth capability, and their cost per unit is set out in etching techniques for perfume bottles: acid vs sandblast.
Applied relief. Epoxy dome labels, cast resin plaques, stamped metal badges, or thick hot-stamp foil. Nothing happens to the glass. These are legitimate options — a metal plaque on a heavy-base flacon can look superb — but they are not embossing, and they should never be quoted as such.
If a quotation says “3D embossed logo” with no process named, ask which of the three. The answer determines the tooling cost, the lead time, the durability, and whether the effect survives your decoration step.
How In-Mold Relief Is Actually Formed
Almost every perfume bottle is made by one of two processes, and the choice constrains relief fidelity more than any design decision you will make.
Press-and-blow. A gob of glass is pressed into a blank mold by a plunger to form a parison, which is then blown into the final shape. Press-blow produces excellent surface detail because the glass is mechanically forced against the mold surface at the blank stage. It is the standard route for wide-mouth jars and for bottles where surface definition is the selling point. Its limitation is neck diameter — narrow-neck flacons are difficult to press.
Blow-and-blow. The parison is formed by blowing rather than pressing, then re-blown into the final mold. Blow-blow handles narrow necks well and is the workhorse for 50–100 ml flacons, but the glass is shaped by air pressure alone in the final stage. Detail fidelity is lower, corners round off, and fine relief tends to soften.
The practical consequence: a design with 0.4 mm raised lettering on the shoulder of a 15 mm-neck flacon is a different technical proposition from the same lettering on a 50 mm-jar. If your supplier quotes the same tooling price for both, they have not looked closely.
Wall thickness is the other determinant. Glass must have enough volume to flow into the engraved detail and enough remaining thickness to survive annealing. Relief cut into a wall that is already thin produces a bottle that passes visual inspection and fails in the filling line.
What the Mold Can and Cannot Hold
These are working limits for a 30–100 ml flacon in clear or sprayed flint glass. They are not absolutes — a good toolmaker can push each one slightly — but a design inside these bounds will tool and run without drama.
| Feature | Practical limit | Note |
|---|---|---|
| Relief depth on sidewall | 0.3–1.5 mm | Above 1.0 mm expect slower cycles and higher reject rate |
| Relief depth on base | up to 2.0 mm | Base glass is thicker and better supported |
| Minimum width of a raised line | 0.8 mm | Thinner lines round over and read as smudges |
| Minimum inside corner radius | 0.5–0.8 mm | Sharp internal corners trap air and do not fill |
| Draft angle on relief walls | 1–3° | Without draft the bottle drags on ejection |
| Clearance from mold parting line | 3 mm minimum | Otherwise your logo carries a seam |
| Minimum wall thickness at relief | 1.8 mm | Below this the relief weakens the bottle |
| Maximum relief height (raised) | 1.5 mm | Higher needs a thicker wall and a dedicated tool |
Two of these cause most of the failures. Draft angle is invisible in a design file and essential in production — a vertical relief wall will scuff as the bottle releases, producing a drag mark that looks like a defect because it is one. Parting line clearance is the reason logos end up positioned oddly: the parting line is where the two mold halves meet, and any detail crossing it will be interrupted by a visible seam.
Debossing follows the same rules in reverse. A deboss is engraved into the mold as a raised feature, so the glass flows around it. Deboss reads better than emboss at small sizes because the shadow falls inside the recess rather than around a raised edge, but the depth is limited by wall thickness in exactly the same way.
Preparing Artwork That a Toolmaker Can Use
Most relief projects lose a week to artwork. The reasons are consistent:
- Gradients and photographic elements cannot be engraved. Relief is a fixed Z-height. Supply vector art with one depth value per element, and state that depth in millimetres.
- Hairlines and thin serifs disappear. Convert type to outlines, then thicken any stroke below 0.8 mm. A serif font at 8 pt on a 50 mm bottle is not achievable; a bold sans at 8 pt is.
- Mirroring is the supplier’s job — confirm it anyway. Embossed detail is engraved as a negative in the mold; debossed detail is engraved as a positive. Miscommunication here produces a mirror-image logo, and it is discovered at sample approval, not before.
- State the relief boundary. A logo that wraps more than 90° around the bottle needs the design flattened deliberately, or it will distort.
- Name the finish. Relief on sprayed glass behaves differently from relief on bare flint. Matte spray over relief can fill the recess and flatten the effect entirely.
Send a single PDF with outlines, a dimensioned callout of depth, and a marked-up photograph of an existing bottle showing what “good” looks like. Toolmakers respond far better to a reference image than to a specification table.
Tooling Cost and Lead Time by Complexity
Relief is not a separate tool. It is engraved into the existing mold, which means the cost depends on whether a mold already exists and how much of its surface must be reworked.
| Complexity | What it looks like | Engraving method | Tooling uplift (indicative) | Added lead time |
|---|---|---|---|---|
| Tier 1 | Single-level logo, one location, flat or gently curved surface | CNC engraving into existing cavity | $600–1,500 | 5–8 days |
| Tier 2 | Two or three relief levels, logo plus a border or a small motif | CNC plus EDM for fine detail | $1,500–3,500 | 8–12 days |
| Tier 3 | Full-surface texture, wrap-around relief, or relief integrated with the silhouette | New engraved cavity insert or new tool | $3,500–8,000 | 12–20 days |
These ranges are indicative for a single-cavity tool and must be confirmed on quote — cavity count multiplies the engraving work, and a four-cavity tool carries four times the cost of the same design. The broader cost structure of a bottle tool, including how relief interacts with cavity count and mold life, is covered in our guide to what a perfume bottle mold actually costs.
The lead time column is the one buyers underestimate. Engraving happens after the cavity is machined and before the tool is polished, and a rework of an existing tool means the tool is out of production. A factory running your bottle on that tool will schedule your engraving around their production calendar, not yours.
Where 3D Detail Fails in Production
Incomplete fill. Sharp corners and thin strokes do not fill when the gob temperature is low or the mold is running cold. The result is a rounded, mushy version of your logo that passes a casual look and fails a first-article inspection. It appears intermittently, usually at the start of a shift.
Check cracks at the relief. Relief creates local thickness variation, and thickness variation is where annealing stress concentrates. A bottle with deep relief on a thin wall can develop fine cracks at the base of the relief that only appear under polarised light.
Tool wear. Engraved detail erodes. Over tens of thousands of shots the relief softens, and a logo that was crisp on the first production run reads as a faint bump on the fifth. This is normal and it is measurable — see perfume bottle mold lifespan for how shot counts are tracked and when re-engraving is due.
Decoration filling the recess. The most common and most avoidable failure. Sprayed colour over embossed glass partially fills the relief, and screen printing over relief produces gaps or a flooded look. The fix is sequencing and technique, covered below.
Seam through the logo. Detail placed across the parting line is interrupted by the mold joint. It cannot be polished out, because the joint is structural.
Any of these will be classified as a defect. The vocabulary used to describe them, and the tolerance language to write into a purchase order, overlaps heavily with the general defect framework in glass defects: stones, cords, bubbles and blisters — particularly the distinction between cosmetic and functional reject classes.
Decorating Over Embossed Glass
Relief and decoration interact, and getting the order right is worth more than any single technique.
Spray plus wipe. Spray the whole bottle, then wipe the raised surface before the coating cures. Colour remains in the recess, the raised elements read as bare or contrasting glass, and the relief is emphasised rather than filled. This is the standard treatment for debossed logos and it is cheap per unit — one spray pass plus a labour step.
Pad printing instead of screen printing. Screen printing needs a flat contact plane; over relief it bridges the recess and produces a flooded or gapped image. Pad printing uses a compliant silicone pad that conforms to modest surface variation and is the correct choice for printing on or beside relief. The trade-offs between the two, and where laser marking fits, are set out in laser engraving vs screen printing on perfume glass.
Hot stamping on a raised surface. Foil transfer needs pressure and dwell. On a raised element the pad must deform around the edges, so specify a soft pad and expect a slight halo. On a recessed area, foil can only reach the floor of the recess if the recess is wider than the pad.
Electroplating or metallising. Vacuum metallising over relief produces a strong highlight-and-shadow effect because the coating is line-of-sight. It also makes any tool mark visible, so the mold polish standard must be agreed before plating.
A useful rule: decide the decoration before you approve the relief depth, not after. A 1.2 mm deboss that looks superb on bare glass can become an invisible groove once a two-coat spray goes on top.
QC: What to Measure on an Embossed Bottle
Relief is difficult to inspect because it is a three-dimensional feature being checked on a two-dimensional sample plan. Four checks cover most of the risk:
- Relief depth, measured with a dial depth gauge or a profile projector on a sectioned sample, at first article and at each production start.
- Definition, assessed against a physical master sample under defined lighting at a stated viewing distance — usually 300–400 mm under diffuse light. Written description is not enough; keep the master.
- Position and orientation, checked against a dimensioned drawing, including distance from the parting line and from the base.
- Absence of drag marks and check cracks, the latter under polarised light at first article.
Write the acceptance criteria into the purchase order as numbers plus a referenced master sample. “Embossing to be sharp and well defined” is not a specification; it is an invitation to argue at destination.
A Simple Cost Model
Take a 50 ml flacon, 8,000 units, Tier 2 relief on the front panel, one cavity.
- Tooling uplift: $2,200, one-time
- Added glass cost from slower cycle and 2% higher reject: $0.03 per unit
- Added decoration labour for spray-and-wipe: $0.02 per unit
Total first-order cost increase: $2,200 + (0.05 × 8,000) = $2,600, or roughly $0.33 per bottle. On the second order of the same volume, without tooling, the relief costs $0.05 per unit — 1.5 cents more than nothing, against a retail positioning benefit that is usually worth considerably more than that.
This is why relief is a sensible investment for a brand that intends to keep a bottle in market for several years, and a poor one for a limited edition.
Briefing a Supplier Properly
Send: vector artwork with outline type and a stated depth per element; a dimensioned drawing showing placement, parting line position and wall thickness; a photograph of an acceptable reference; the decoration plan and its sequence; the intended order volume and expected repeat volume; and a written question asking which forming process the factory will use and what relief depth they can guarantee on that process.
That last question separates suppliers who have run relief before from those who will learn on your tool.
FAQ
What is the difference between embossing and debossing on a glass bottle?
Embossing raises the design above the surrounding surface; debossing recesses it below. Both are formed in the mold — the engraving is simply inverted. Deboss generally reads better at small sizes and holds sprayed colour well, while emboss catches light more strongly and is easier to wipe clean.
Can any perfume bottle be embossed?
No. Relief requires wall thickness, and narrow-neck flacons made by blow-and-blow forming cannot hold fine detail as well as press-and-blow jars. A practical minimum is 1.8 mm wall at the relief location, with 0.3–1.5 mm depth on the sidewall. Designs outside these limits need a new tool or a different forming route.
How much does embossing add to the tooling cost?
Indicatively $600–1,500 for a single-level logo engraved into an existing cavity, $1,500–3,500 for multi-level relief, and $3,500–8,000 for full-surface or wrap-around detail requiring a new insert. Cavity count multiplies the engraving work. Always confirm on quote against your specific design.
Does embossing add to the unit price?
Yes, typically $0.02–0.06 per bottle, from slower forming cycles, a higher reject rate at the relief, and any extra decoration step such as spray-and-wipe. The tooling is one-time; the unit uplift is permanent.
How do I stop decoration from filling the embossed detail?
Choose the sequence deliberately. Spray then wipe leaves colour in the recess and exposes the raised surface — the standard approach for debossed logos. Avoid screen printing over relief, which bridges the recess; use pad printing, which conforms to surface variation. Agree the decoration plan before approving the relief depth.