Almost every serious dispute in custom perfume bottle sourcing traces back to the same root cause: something that should have been decided during sample approval was instead decided — or left undecided — during mass production. The bottle arrives a gram lighter than the prototype, the gold band sits 2 mm lower, the neck finish measures in at the tolerance limit and the pumps crimp inconsistently. None of these are production failures. They are approval failures: the buyer and the supplier never signed off on the same, specific, measurable definition of “correct.”
A disciplined sample approval workflow is the cheapest quality investment available in a custom perfume glass bottle program. It costs days, not dollars, and it eliminates the majority of disputes before they can occur. This article lays out the workflow stage by stage, with the documents, tolerances and sign-off criteria that make each stage meaningful, written from the buyer’s side of the table.
Why Sample Approval Goes Wrong
The failure pattern is consistent across factories and continents. The buyer sends a reference bottle or a sketch. The factory makes a “sample” — usually a hand-made or first-off-tool piece — and photographs it nicely. The buyer likes the photos and approves. Production follows weeks later, and the mass-produced bottles differ from what the buyer thought they approved, because:
- Nobody defined what “approve” meant. Approval of a prototype answers a design question (“is this the shape I want?”), not a production question (“can every bottle in a 50,000-piece run look like this?”).
- No dimensional drawing existed. Without a dimensioned drawing with tolerances, the approved sample is the only spec — and samples vary.
- Colour was approved under one light source. A flint glass bottle that looks neutral under D65 daylight can read warm under retail lighting.
- The seal interface was never tested. The bottle looked right, but nobody crimped the actual pump at the actual production setting and checked the seal.
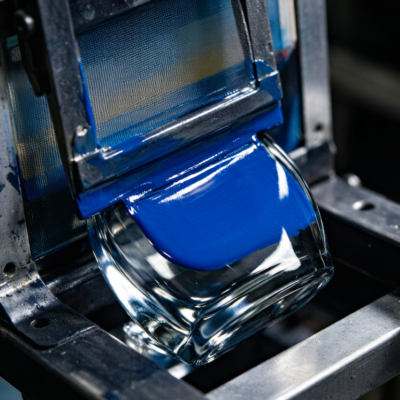
- Decoration was approved on a single piece. Print position, colour match and foil coverage need to be assessed across a sample set, not one hero piece.
Every one of these is fixable with process, and the workflow below fixes them in order.
The Five Stages of a Proper Approval Workflow
A custom bottle program should move through five distinct approval gates. Collapsing them into one “sample stage” is where programs go wrong; keeping them separate is what makes sign-off real.
| Stage | What exists | What you approve | Typical timing | Key deliverable |
|---|---|---|---|---|
| 1. Concept / drawing | Dimensioned drawing, 2D + 3D | Shape, dimensions, tolerances, capacity, neck finish spec | 3–7 days | Signed drawing rev. A |
| 2. Prototype | Hand-made or 3D-printed plus machined sample | Proportions, feel, weight, label fit, shelf presence | 7–15 days | Approved prototype, retained by both sides |
| 3. Production tooling first-off | First bottles from the production mold | Production-representative dimensions and appearance | 10–20 days after mold completion | First-article inspection report (FAIR) |
| 4. Decoration / printing sample | Decorated production pieces | Print colour, position, adhesion, cap fit | 5–10 days | Approved decoration master + spec sheet |
| 5. Pilot run / golden sample | Bottles from full production conditions | Everything, under production speed | 1–3 days run | Golden sample set, sealed and referenced in PO |
The distinctions are not bureaucratic decoration. A prototype tells you what the design looks like; a first-off tells you what the tool actually produces; a golden sample tells you what the process yields at speed. These are three different questions, and only the last one is a valid reference for incoming inspection of a mass-production order. The trade-offs between the two routes to a physical sample — rapid prototyping versus cutting steel — are covered in our prototype versus production sample guide.
Stage 1: The Drawing Is the Contract
Everything begins with a dimensioned drawing, and the quality of that document determines the quality of every later stage. A drawable perfume bottle specification needs, at minimum:
- Overall dimensions: height, body width/depth or diameter, with tolerances.
- Capacity: brimful and fill capacity in ml, stated with tolerance (typically ±1–2 ml at 50 ml scale).
- Weight: target gram weight with tolerance (±3–5 g on a 400 g heavy-base flacon is normal; tighter on premium pieces).
- Neck finish: full spec with reference to standard finishes or a dedicated drawing — this single dimension drives pump compatibility, and the options are laid out in 13/415 vs 15/415 neck finishes.
- Wall thickness: minimum wall in critical zones, base thickness if it is a design feature.
- Decoration zones: printable areas, curve radii at print surfaces, minimum flat band for silk-screen.
- Datums and measurement points: which surfaces are datum A/B/C, so inspection reports measure the same things the moldmaker machined.
The tolerance philosophy deserves a sentence of its own. Custom glass is not machined steel; typical achievable tolerances on bottle height are ±0.5–1.0 mm, on body dimensions ±0.5–2.0 mm depending on size and section. A drawing that demands ±0.2 mm on a free-blown body dimension will either fail or force a cost premium for no buyer benefit. The tolerance levels that glass forming can realistically hold are quantified in our glass bottle tolerance guide. Put realistic tolerances on the drawing, revision-controlled, and treat every later deviation question by pointing at the drawing — not at anyone’s memory.
One rule: the drawing carries a revision number, and both parties’ signatures on it. If the mold is cut from drawing rev. A and your team later requests a change, the change goes through a new revision and a documented cost/time impact assessment. Programs that skip this accumulate verbal modifications that nobody can reconcile at the end.
Stage 2: Prototype — Approving the Design
The prototype answers design questions, and only design questions: proportions, hand feel, weight perception, cap pairing, label placement, how the bottle photographs. Because prototypes are made by hand or on prototype tooling, their dimensional accuracy is limited, and that is acceptable — you are not inspecting the prototype, you are evaluating it.
Practical points that make prototype evaluation rigorous rather than impressionistic:
- Evaluate at least 2–3 prototype pieces, because hand-made pieces vary and one lucky piece is not a design.
- Assemble the full unit: prototype bottle, actual cap or cap prototype, actual pump if the neck is standard. Buyers who approve a bare bottle routinely discover at production that the chosen cap visually swamps the shoulder or that the pump reveals too much neck.
- Check label fitment physically: apply a printed label dummy at final position, on the curve, in the actual adhesive. Curved shoulders that look label-friendly in 3D renders frequently are not.
- Photograph under retail-relevant lighting, not just factory daylight.
- Record the approved prototype’s weight and key dimensions, even though production tolerances will differ — this anchors expectations.
The prototype should exist in two identical sets: one retained by you, one by the factory, both marked as “approved prototype, drawing rev. X, date, signatures.” Everything downstream references this pair.
Stage 3: First-Article From Production Tooling
This is the stage most programs skip, and skipping it is the most expensive shortcut in custom glass. The prototype was not made in the production mold. The production mold is new steel, cut from the drawing by a mold shop — the quality of that machining, and of the mold’s hot alignment, is unknown until glass is formed through it. Mold-making quality itself is a separate discipline, covered in our CNC mold making guide and reflected in the cost structure explained in the perfume bottle mold cost guide.
The first-off inspection — the first-article inspection report, or FAIR — should measure every dimension on the drawing, at every measurement point, on a defined sample (typically 3–10 pieces), and record:
- Actual measured values vs. drawing tolerance, per dimension, pass/fail.
- Weight distribution across the sample set.
- Capacity verification (fill to line, weigh).
- Visual condition: seams, parting lines, fire-polish quality at the mouth, any mold-marks.
- Capacity/weight correlation, which reveals wall distribution problems.
Two decisions follow the FAIR: accept the tooling, or correct it. A first-off that violates drawing tolerances means the mold needs adjustment before production — a normal event in custom work, provided it is caught now. The catastrophic version is a program that discovers at final inspection that 3% of the run exceeds height tolerance, because the mold was off and nobody measured a first-off.
Stage 4: Decoration Approval
Decorated samples close the loop on everything the bottle gains after forming: printing, foiling, coating, frosting, cap assembly. The approval set should be production pieces decorated under production conditions — not a lab-sprayed special — and evaluated against specific criteria:
| Element | Approval criterion | Method |
|---|---|---|
| Print colour | Match to approved standard (Pantone or physical swatch), ΔE tolerance agreed (typically ≤ 1.5–2.0) | Spectrophotometer or visual under D65 + retail light |
| Print position | Within ±0.5–1.0 mm of drawing position on production datum | Fixture gauge or projection |
| Ink adhesion | Passes cross-cut/tape test per agreed standard; survives alcohol rub test for the stated cycle count | Standard adhesion test kit |
| Foil / stamping | Complete transfer, no pinholes, correct registration | Visual, magnified |
| Coating / frosting | Uniform coverage, agreed haze/gloss values | Visual + gloss meter if specified |
| Cap fit | Torque to spec (screw) or crimp height within tolerance (crimp), no rocking | Torque meter / crimp gauge |
Print colour is the single most disputed item in decoration, so fix the method at approval time: which instrument, which light booth, which tolerance. “It looked fine in the sample photos” resolves nothing in a 50,000-piece dispute.
Stage 5: Golden Sample and Pilot Run
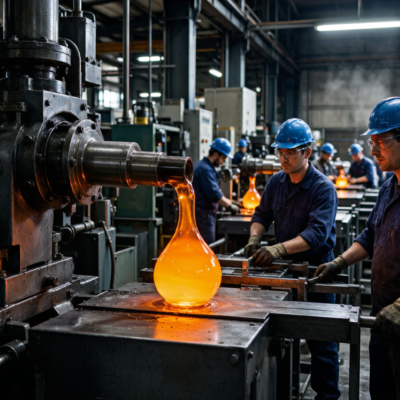
The final gate is a pilot run — a short production run under real line speed, real furnace conditions, real decorating line. From it, both parties seal a golden sample set: typically 5–10 bottles covering the acceptable range of the process, individually marked and referenced by number in the purchase order. This set becomes the reference for incoming inspection on the mass-production order and for any later re-order, which matters because molds wear and processes drift between orders — the long-game considerations are part of the broader perfume bottle sampling process.
Golden samples are valuable only if they are controlled: sealed in bags, dated, signed across the seal, one set with the buyer, one with the factory, one with the third-party inspector if one is used. An uncontrolled golden sample set — “we have some bottles in the office somewhere” — is decorative, not contractual.
Writing the Approval Workflow Into Your PO
The workflow only binds the supplier if the purchase order references it. The core clause set:
- Drawing control: production is against drawing rev. [X], signed by both parties on [date]. Changes require written agreement and a documented cost/time impact.
- Approval sequence: mass production may not start before written approval of (a) first-article report, (b) decoration approval, (c) golden sample set. Buyer approval must be requested with defined lead time.
- Golden sample reference: incoming inspection against golden sample set #GS-001 and drawing rev. X.
- Retention: supplier retains approved samples and FAIR records for the life of the program plus [24] months.
- Re-approval triggers: mold changes, cap supplier changes, glass composition changes, or factory line changes each require re-approval before shipping against the existing approval.
Programs that work with suppliers on an OEM-versus-ODM basis will find the workflow identical in structure either way — the difference is who originates the drawing, a distinction unpacked in OEM vs ODM perfume bottles — but the approval gates apply to both, because in both cases mass production must be traceable to a signed reference.
Common Pitfalls and How to Avoid Them
- Approving by photograph. Photos hide seam lines, colour casts and surface quality. Approve physical pieces or high-resolution samples in hand, always.
- Single-piece approval. Glass is a distribution, not a point. Approve sets, not units, and agree what the acceptable range within the set is.
- Skipping the first-off to save time. The two weeks “saved” by starting production on unverified tooling is repaid with interest in final-inspection rework or, worse, a shipment of non-conforming bottles.
- Verbal modifications at the factory. Well-meaning engineers adjusting anything between approval stages — a gate timing, a print position nudge — void the approval. Every change goes through the revision process, even small ones.
- Approval documents that live in email. Keep a single approval dossier per program: drawing revs, FAIR, decoration approval, golden sample log, PO references. When a dispute arrives, the dossier answers it; scattered emails litigate it.
FAQ
What is the difference between a prototype sample and a production sample?
A prototype is made by hand or on prototype tooling to evaluate the design — its dimensions are indicative, not contractual. A production (first-article) sample is formed in the actual production mold under production conditions and is the piece against which dimensional sign-off happens. Design approval belongs to the prototype; production approval belongs to the first-off. Confusing the two is the most common cause of “the bottles don’t match the sample I approved.”
How many samples should I approve from?
At least 2–3 prototypes at the design stage, 3–10 pieces for the first-article dimensional report, and 5–10 sealed golden samples from the pilot run. Glass production yields a distribution, and approving a single piece tells you nothing about the range you will receive in mass production.
Who owns the mold and the drawing?
Whatever the contract says — which is why it must say something. Default OEM practice: the buyer pays for the mold and owns the drawing, and the supplier may not run the mold for anyone else without written permission. ODM variants vary. Both ownership and exclusivity should be stated in the PO or mold agreement, alongside the re-approval triggers listed above.
How long does a full sample approval workflow take?
Drawing to signed prototype typically takes 2–3 weeks; production mold fabrication 15–25 days depending on complexity; first-off plus correction cycles 1–2 weeks; decoration approval and pilot run another 1–2 weeks. Realistic total for a custom bottle from a standing drawing: 6–9 weeks. Compressing below that usually means skipping gates, and the skipped gate always resurfaces as a production problem.
What is a golden sample and why do I need one?
A golden sample set is a set of bottles from the pilot run, sealed and signed by both parties, referenced in the PO as the inspection standard for the mass order and future re-orders. It is needed because the approved prototype and the first-article report date from before full production; the golden sample captures what the process actually delivers at speed, and it is the arbiter for any later disagreement about what was accepted.